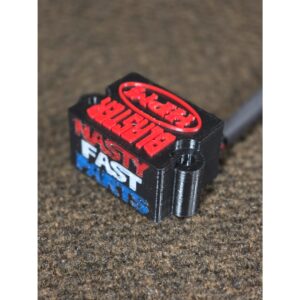
Blaster Adjustable CDI HPM/Nasty Fast Parts (88-02 1st gen).
This high quality replacement CDI is a direct replacement. These are made here in USA and have an intricate internal electrical board tucked inside the case.
Installation
Installation of the CDI is a straightforward, bolt-on process.
Remove the front hood plastic.
Remove or relocate the TORS (Throttle Over Ride System) box, which is often recommended to be removed from the Blaster as it can cause issues.
Plug the new CDI in and bolt it down using the supplied hardware.
Tuning
The CDI features five settings per each of the two rotary switches, offering 25 possible timing curves.
Adjustments: The left switch makes coarse adjustments, and the right switch makes finer adjustments. Position 1 is all the way counterclockwise.
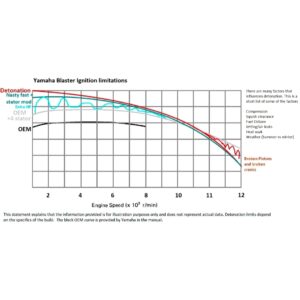
Timing: Turning the switches clockwise advances the base timing while retarding the high RPM timing. Position 5 on the left switch and position 1 on the right switch will advance the base timing by 3.5 degrees.
OEM Curve: The original equipment manufacturer (OEM) curve is at position 1 on both switches, which provides the least amount of base timing and the most advanced high RPM timing.
Starting Point: A good starting point for tuning is position 3 on both switches.
Recommendations & Notes
Stator Advance: Modifying and advancing the stator by 3-4 degrees is recommended.
Caution: Too much timing can cause pinging (detonation) or overheating, so it’s important to listen to the motor. Advancing the stator by more than +6 degrees may cause kickback.
Monitoring: Using a spark plug temperature sensor is advised for monitoring; around 320° F is ideal, while 380° F is considered hot.
Water Resistance: The unit is water-resistant, but not waterproof. Avoid high-pressure water, especially around the adjustment switches.
We will have your products shipped 1-3 business days! We use 24 hours service with carriers in most cases so that you can get your order delivered on time.
There is $5.99 charge for delivery under $100 Orders. Additional charges will be imposed by our couriers for delivery to remote area, a surcharge may be levied to cover carriage to these areas.
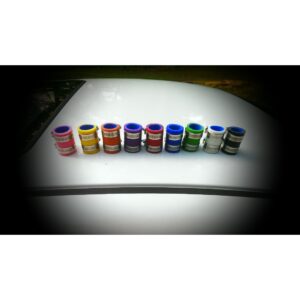
Blaster Adjustable CDI HPM/Nasty Fast Parts (88-02 1st gen).
This high quality replacement CDI is a direct replacement. These are made here in USA and have an intricate internal electrical board tucked inside the case.
Installation
Installation of the CDI is a straightforward, bolt-on process.
Remove the front hood plastic.
Remove or relocate the TORS (Throttle Over Ride System) box, which is often recommended to be removed from the Blaster as it can cause issues.
Plug the new CDI in and bolt it down using the supplied hardware.
Tuning
The CDI features five settings per each of the two rotary switches, offering 25 possible timing curves.
Adjustments: The left switch makes coarse adjustments, and the right switch makes finer adjustments. Position 1 is all the way counterclockwise.
Timing: Turning the switches clockwise advances the base timing while retarding the high RPM timing. Position 5 on the left switch and position 1 on the right switch will advance the base timing by 3.5 degrees.
OEM Curve: The original equipment manufacturer (OEM) curve is at position 1 on both switches, which provides the least amount of base timing and the most advanced high RPM timing.
Starting Point: A good starting point for tuning is position 3 on both switches.
Recommendations & Notes
Stator Advance: Modifying and advancing the stator by 3-4 degrees is recommended.
Caution: Too much timing can cause pinging (detonation) or overheating, so it’s important to listen to the motor. Advancing the stator by more than +6 degrees may cause kickback.
Monitoring: Using a spark plug temperature sensor is advised for monitoring; around 320° F is ideal, while 380° F is considered hot.
Water Resistance: The unit is water-resistant, but not waterproof. Avoid high-pressure water, especially around the adjustment switches.
We will have your products shipped 1-3 business days! We use 24 hours service with carriers in most cases so that you can get your order delivered on time.
There is $5.99 charge for delivery under $100 Orders. Additional charges will be imposed by our couriers for delivery to remote area, a surcharge may be levied to cover carriage to these areas.


Reviews
There are no reviews yet.